On View Camera Movements
The movements on a view camera are one of those things that once you get used to having, it’s hard to do without. I have a photograph from a recent trip to illustrate some of it, so here we go.
When taking a picture with a camera, there are three principal planes at play: the subject plane, the lens plane, and the film (or, for the digital natives, sensor) plane. The relative position of these three planes determines what the photograph will look like.
On a standard fixed lens camera, the lens and film planes are parallel to each other, which means you cannot alter the relative position of the film plane to the subject plane without changing the relationship between the subject and lens plane at the same time. On a view camera the two relationships can be controlled independently of each other: the lens and film planes can be rotated around vertical and horizontal axes, as well as shifted relative to each other.
The relative position of the film and subject planes controls perspective. This is something most photographers will be familiar with: if the film plane is not vertical then verticals in the scene will not be vertical, and hence parallel, on the photograph. The problem is, of course, that you cannot make a fixed lens camera look up without it going out of being vertical; a view camera you can: you set it up so that the film plane is vertical, and then move the lens up/down/left/right independently as required, which keeps the verticals vertical and parallel (or, if you want, you can make railway tracks not to converge in a distance, or converge faster, etc., by tilting the film plane).
This is useful, particularly when architecture is involved, and once you get used to verticals being vertical and parallel, anything else very quickly gets annoying. But it’s the other relationship, between the lens plane and the subject plane, that is the more interesting and fun one.
The relative position of the lens and subject planes controls focus. A lens can only focus at a single distance, a focus plane parallel to the lens plane. But human vision has limited resolution, so there is a band either side of this plane of focus where the image looks to us to be sharp. We call this depth of field, and it’s a function of the lens’ focal length, the aperture used to take the picture, and the size of the final photograph; again, this is something that most photographers are familiar with.
But because on a view camera the lens plane can be rotated relative to the subject, the band in which the image appears sharp can be at a different distance from the camera at different parts of the image. This then can be used, for example, to ensure sharp focus at a very near distance and at infinity at the same time.
There is a common, enduring, cliche in landscape photography: the foreground boulder cliche. This originated precisely in this capability of the view camera, and cannot be executed properly without it: images making use of it that are taken with a fixed lens camera are never sharp at infinity — this is an easy way to spot an image taken with a view camera, you might want to look for it next time you look at a photograph of one of the old masters that makes use of this cliche.
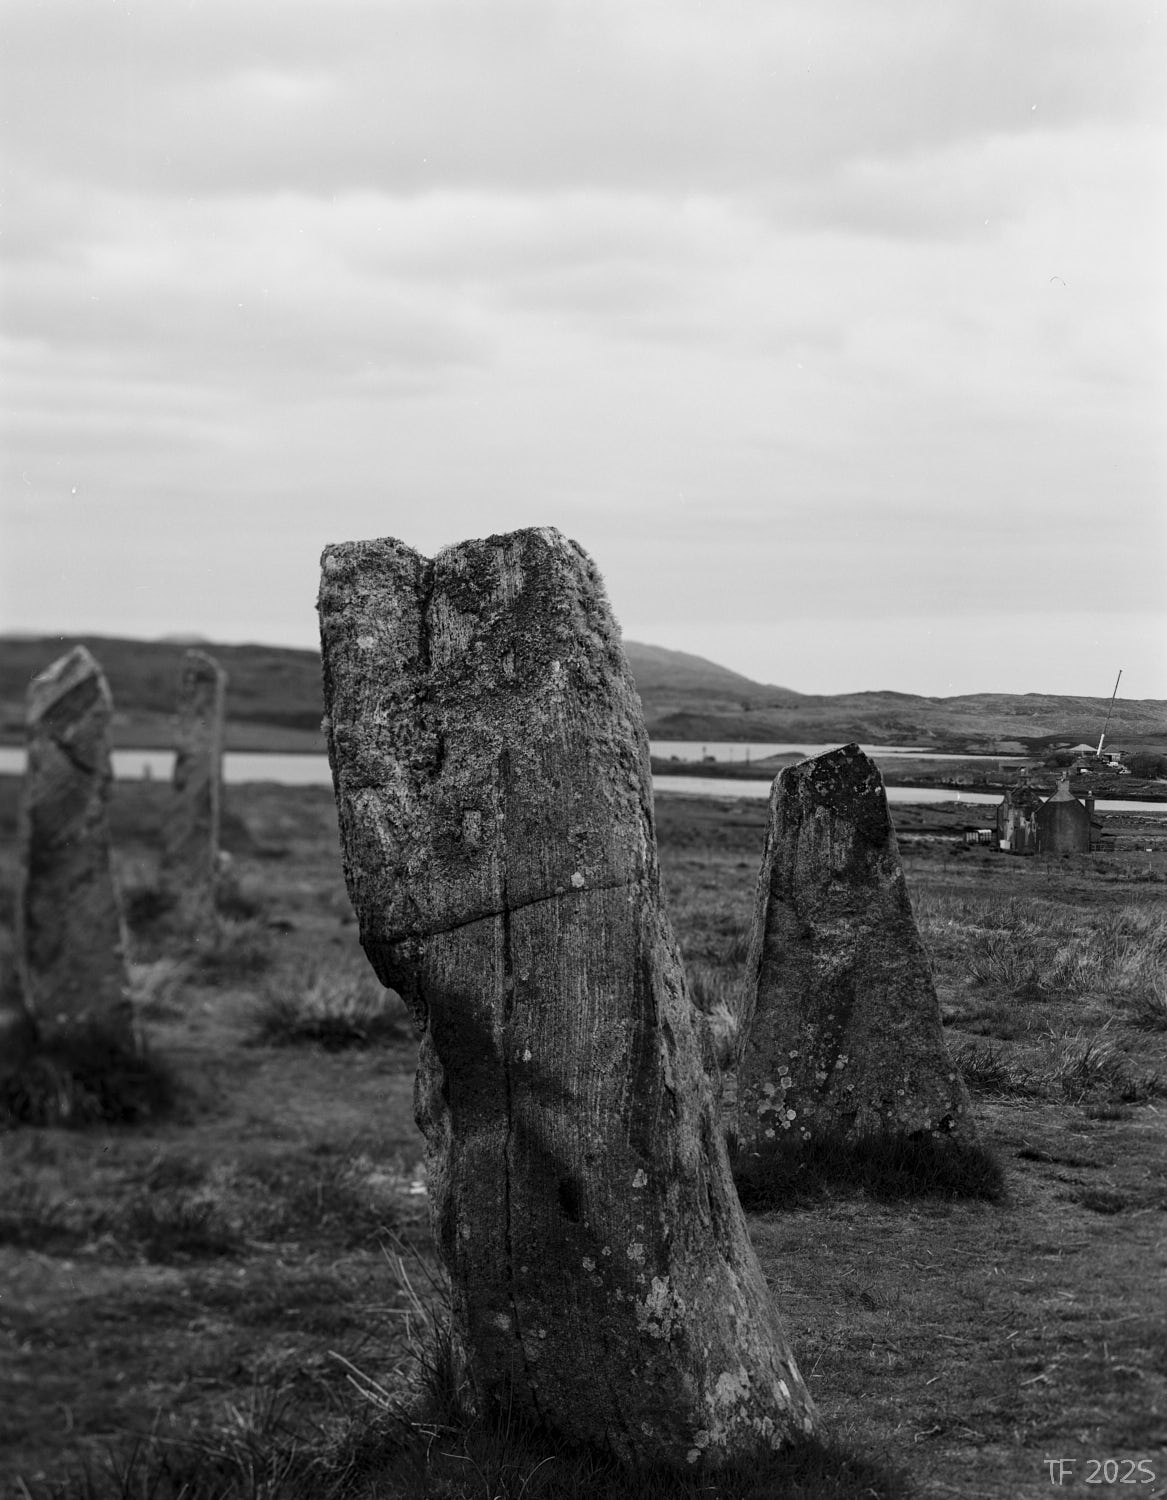
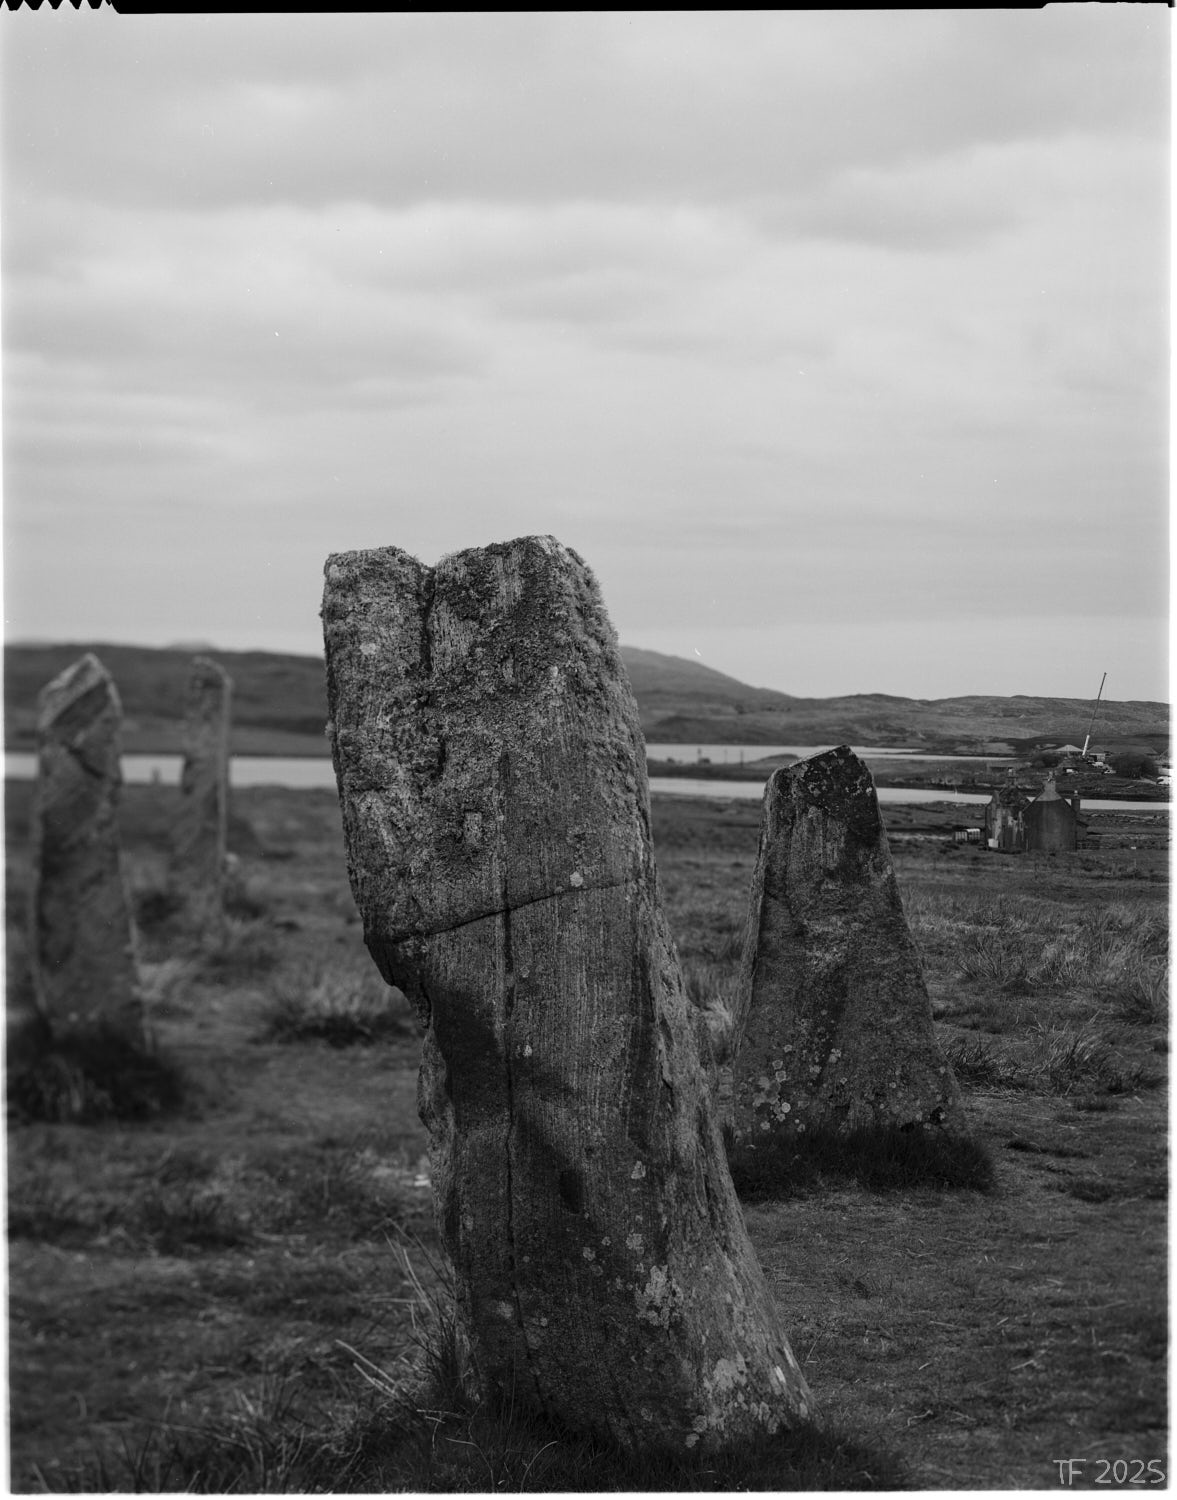
As they say, a picture is worth a thousand words, and the two images below show the effect of altering the focus plane rather clearly. The intention here was to get the forefront standing stone, the derelict house and the crane in the background sharp. To this effect the lens was swung quite a bit to the left, to slant the focus plane.
Because in this case the three objects are pretty much on a direct line, this can be done almost perfectly and gives decent sharpness even with the lens quite wide open, as the lower of the two images shows (these were shot with a 210mm lens, the top one at f32, the lower one at f16).
At the same time, the two standing stones on the left side of the image are blurred in both cases, even though they are much closer to the foreground than the derelict house — they are outwith the depth of field around the slanted focus plane, even at f32, and so is the background behind them; in fact you can see the background starting to blur from about 1/3 of the image from the right, just above the rightmost stone.
There are formulae and mechanical calculators to work out the optimal swing and tilt for a particular scenario, but for landscapes most of the time you just iteratively tweak it in both directions to get what you need, and then close the lens for the required depth of field.
For a 4x5 camera, the rule of thumb is 7x focus spread in mm gives an adequate depth of field, and 10x optimal one, i.e., if the difference between perfect focus of the nearest and farthest points you care about is 3mm, you should use f32, unless the exposure time cannot be tolerated, setting the focus in the middle of the two sharp values (this is why a view camera should always have a focus scale; one can be easily made from some graphing paper, if the camera doesn’t have it).
How much movement can be applied to a lens depends on the size of its image circle (movements are effectively just cropping a much bigger image), which depends on the lens construction; invariably the price for a big image circle is size and weight. Also, telephoto lenses are pain to apply movements to, but that’s a topic for another day.
You can have the same kind of fun with a digital camera if you use a (rather expensive) tilt-shift lens; but the beauty of the view camera is the movements are part of the camera, not the lenses, and you are working with a good sized image to see what is happening while making the changes.